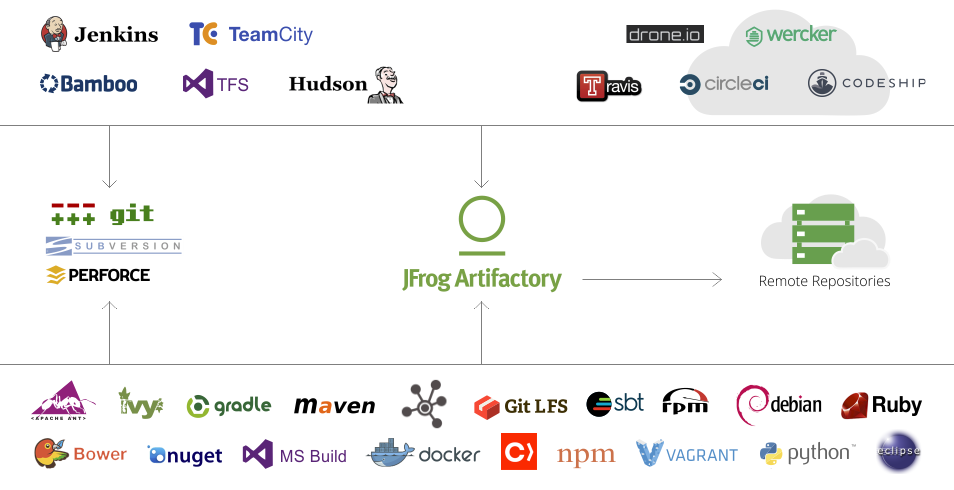
制品仓库系统有很多,例如Artifactory、Archiva、Sonatype Nexus、Eclipse Package Drone,其中Artifactory拥有很多强大的企业级特性和人性化的用户接口,拥有众多客户群。很多大型的公司都在使用它,通过以下的Google趋势图可以看出,它越来越受青睐。功能对比在此:Binary Repository Manager Feature Matrix
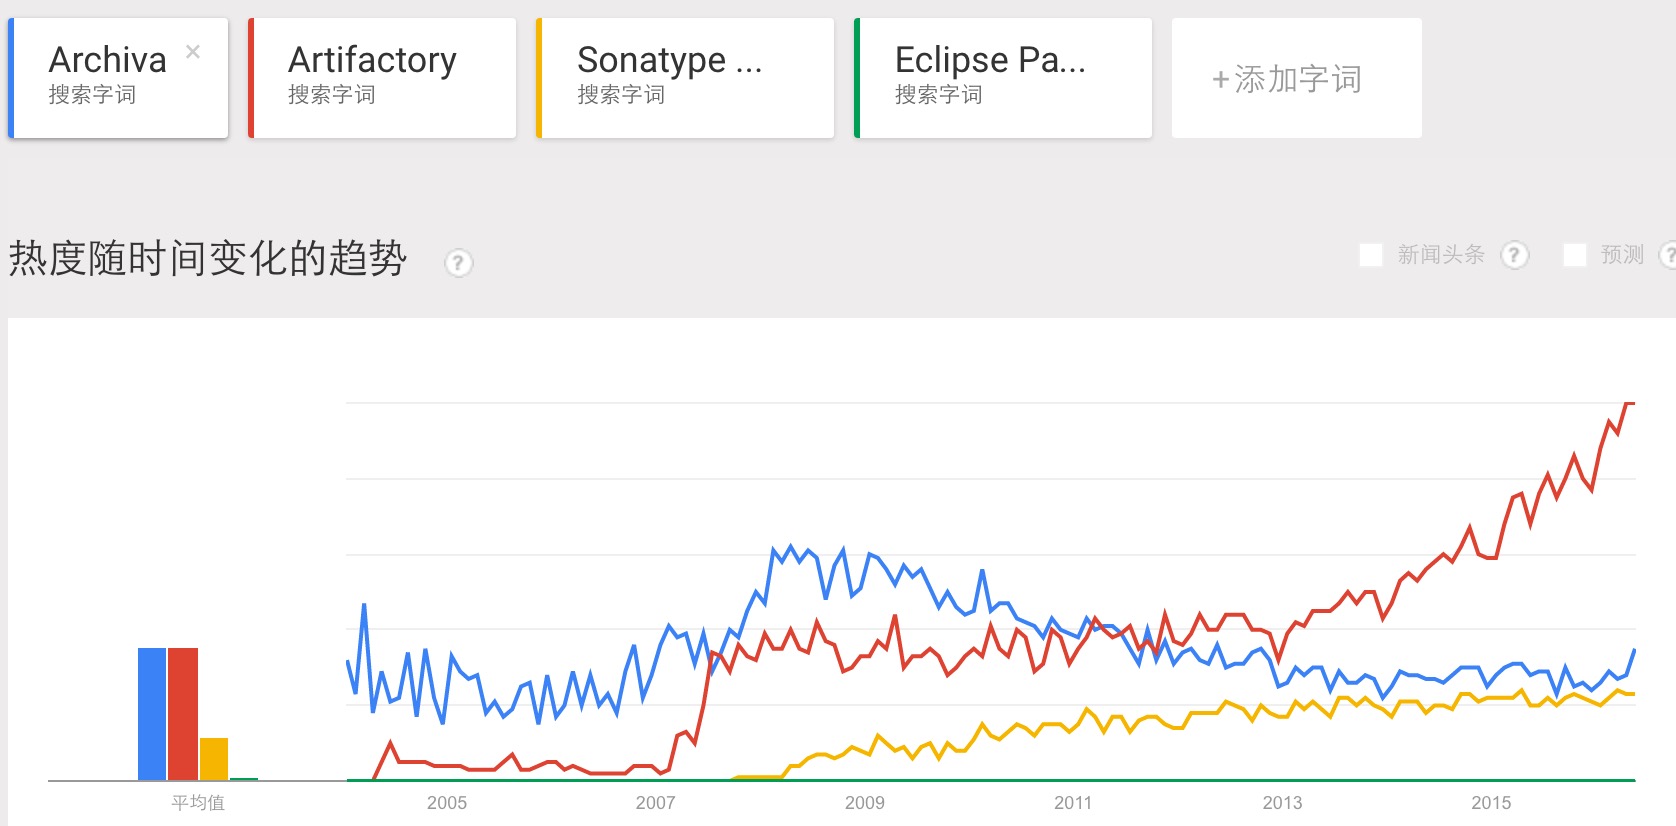
本文将尝试在阿里云上搭建Artifactory集群。
Artifactory许可证
官方正版license,3个 License 25900美元(16.7万人民币)一年,贵的离谱。本文以实验学习为主使用最新破解版4.7.4,破解也非常容易就不赘述了。商业用途,请使用正版。
所需硬件
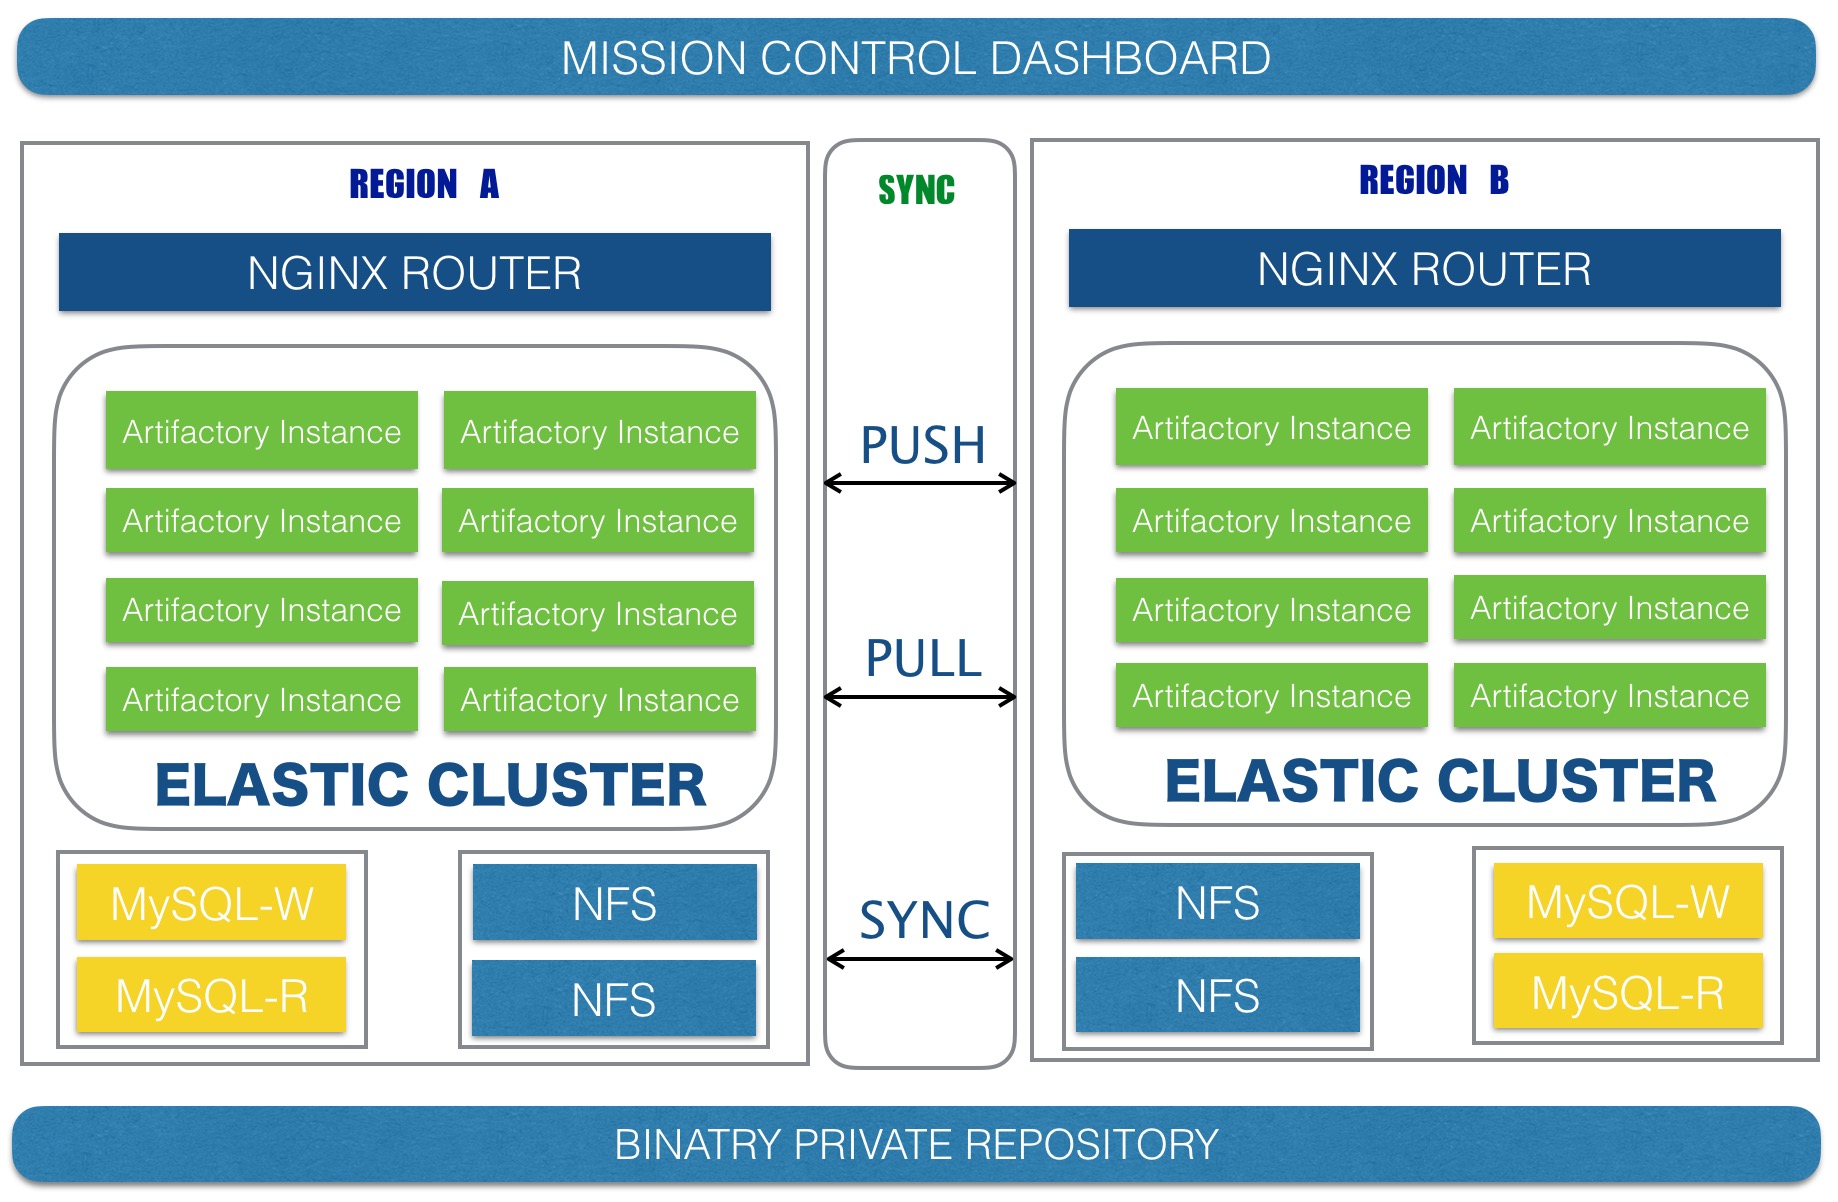
Artifactory集群需要以下硬件设备:
- 支持粘性会话的均衡负载(HAProxy/Nginx等)。
- NFS共享文件夹。
- 数据库(MySQL等)。
搭建架构图
网络
集群中所有的节点最好处于同一局域网内,节点之间使用固定端口传输数据。
服务器
本文使用阿里云ECS服务器,申请三台阿里云ECS服务器分别取名artifactory-master,artifactory-slave,artifactory-nfs。
Artifactory节点配置
artifactory会部署在artifactory-master和artifactory-slave上,需要安装所需的软件。
- 生成ssh key并配置authorized_keys方便服务管理。
安装JDK 8。
1
2
3
4
apt-get install software-properties-common
add-apt-repository ppa:webupd8team/java
apt-get update
apt-get install oracle-java8-installer编辑.bashrc文件
vi ~/.bashrc在文件尾加入以下内容:1
2
3if [ -f ~/.bash_env ]; then
. ~/.bash_env
fi创建
.bash_env文件touch ~/.bash_env并添加JAVA_HOME环境变量:1
2
3
4export JAVA_HOME=/usr/lib/jvm/java-8-oracle
export JRE_HOME=$JAVA_HOME/jre
export CLASSPATH=.:$JAVA_HOME/lib/dt.jar:$JAVA_HOME/lib/tools.jar:$JRE_HOME/lib
export PATH=$JAVA_HOME/bin:$PATH上传artifactory-pro-4.7.4.zip到artifactory-master和artifactory-slave服务器
/opt目录并解压,并生成两个不同的artifactory.lic许可证,分别放在/opt/jfrog/artifactory-pro-4.7.4/etc目录下。1
scp artifactory-pro-4.7.4.zip root@<ip>:/opt
分别在artifactory两个节点设置artifactory环境变量,编辑
.bash_env文件。1
2
3
4
5export ARTIFACTORY_HOME=/opt/jfrog/artifactory-pro-4.7.4
export JAVA_HOME=/usr/lib/jvm/java-8-oracle
export JRE_HOME=$JAVA_HOME/jre
export CLASSPATH=.:$JAVA_HOME/lib/dt.jar:$JAVA_HOME/lib/tools.jar:$JRE_HOME/lib
export PATH=$JAVA_HOME/bin:$PATH安装artifactory as service。
1
2
3sh installService.sh
passwd artifactory <new password>
NFS配置
NFS配置需要在artifactory-nfs上安装NFS服务端,需要在artifactory-master和artifactory-salve上安装NFS客户端。
在artifactory-nfs服务器上安装nfs-kernel-server。
1
apt-get install nfs-kernel-server
在/etc/exports文件里增加一行。
1
/artifactory/cluster-home *(rw,sync,no_root_squash,no_subtree_check)
在artifactory-master和artifactory-salve分别安装NFS客户端。
1
apt-get install nfs-common portmap
在artifactory-master和artifactory-salve分别创建NFS待挂载目录/artifactory/cluster-home。
1
2mkdir /artifactory/cluster-home
mount <artifactory-nfs' IP>:/artifactory/cluster-home /artifactory/cluster-home将NFS目录分配权限。
1
2
3
4
5
6
7
8
9
10
11
12
13
14
15
16
17chown -R artifactory:artifactory /artifactory/cluster-home
```
###安装MySQL
在artifactory-nfs上安装MySQL。
1. 安装MySQL。
```bash
apt-get install mysql-server mysql-client
mysql>
CREATE DATABASE artdb CHARACTER SET utf8 COLLATE utf8_bin;
CREATE USER artifactory IDENTIFIED BY 'password';
GRANT ALL PRIVILEGES ON *.* TO 'artifactory'@'%' IDENTIFIED BY 'password' WITH GRANT OPTION;
FLUSH PRIVILEGES;- 允许MySQL远程访问。修改云主机上的/etc/mysql/my.cnf 文件,注释掉 bind_address=127.0.0.1就可以了。
配置artifactory-master
在
/artifactory/cluster-home下创建一下目录:1
2
3mkdir ha-etc
mkdir ha-data
mkdir ha-backup在
./ha-etc下创建文件cluster.properties,内容为:1
2##随机生成的token,保证唯一就行
security.token=4n4tpxip7spQQu2pKf3811S2W7GY46Yb在
./ha-etc下创建文件storage.properties,内容为:1
2
3
4
5type=mysql
driver=com.mysql.jdbc.Driver
url=jdbc:mysql://<artifactory-nfs' IP>:3306/artdb?characterEncoding=UTF-8&elideSetAutoCommits=true
username=artifactory
password=password复制
artifactory.system.properties和mimetypes.xml文件1
2mv /opt/jfrog/artifactory-pro-4.7.4/etc/artifactory.system.properties /artifactory/cluster-home/ha-etc
mv /opt/jfrog/artifactory-pro-4.7.4/etc/mimetypes.xml /artifactory/cluster-home/ha-etc在/opt/artifactory-pro-4.7.4/etc目录下创建
ha-node.properties文件,内容如下:1
2
3
4
5node.id=art1
cluster.home=/artifactory/cluster-home
context.url=http://<artifactory-master's IP>:8081/artifactory
membership.port=10001
primary=true在
.bash_env文件添加$CLUSTER_HOME环境变量。1
2
3
4
5
6export ARTIFACTORY_HOME=/opt/jfrog/artifactory-pro-4.7.4
export CLUSTER_HOME=/artifactory/cluster-home
export JAVA_HOME=/usr/lib/jvm/java-8-oracle
export JRE_HOME=$JAVA_HOME/jre
export CLASSPATH=.:$JAVA_HOME/lib/dt.jar:$JAVA_HOME/lib/tools.jar:$JRE_HOME/lib
export PATH=$JAVA_HOME/bin:$PATH
配置artifactory-slave
注意:对于每个artifactory集群节点使用的artifactory.lic是不一样的,否者将会报错。
在/opt/jfrog/artifactory-pro-4.7.4/etc目录下创建
ha-node.properties文件,内容如下:1
2
3
4
5node.id=art2
cluster.home=/artifactory/cluster-home
context.url=http://<artifactory-slave's IP>:8081/artifactory
membership.port=10001
primary=false在.bash_env文件添加
$CLUSTER_HOME环境变量。1
2
3
4
5
6export ARTIFACTORY_HOME=/opt/jfrog/artifactory-pro-4.7.4
export CLUSTER_HOME=/artifactory/cluster-home
export JAVA_HOME=/usr/lib/jvm/java-8-oracle
export JRE_HOME=$JAVA_HOME/jre
export CLASSPATH=.:$JAVA_HOME/lib/dt.jar:$JAVA_HOME/lib/tools.jar:$JRE_HOME/lib
export PATH=$JAVA_HOME/bin:$PATH
安装HAProxy负载均衡
对于负载均衡HAProxy的性能会比Nginx好很多。
安装HAProxy
1 | apt-get install haproxy |
配置HAProxy
1 | global |
启动
1 | su - artifactory |
仓库之间复制
Artifactory允许支持不同地区不同项目之间artifactory实例复制。带来的好处有以下几点:
- 不同地区的开发团队可以使用相同artifacts。
- 构建的产出artifacts能够及时共享。
- 缓解远程网络连接不稳定性。
- 访问远程其他artifactory仓库。
Push方式
用于本地仓库,上传到某个artifactory实例的某个本地仓库能够同步到其他远程artifactory仓库里面。
Pull方式
用于远程仓库,将远程artifactory仓库同步到本地artifactory某个仓库。
安装JFrog Mission Control
服务器有限,在artifactory-master上安装Mission Control。
1 | wget https://akamai.bintray.com/84/842469ab2f8d53dcd01e99c1f96b39b7580571a20096f741446e5c789ff2bca5?__gda__=exp=1462285257~hmac=76ab0b04df1b8b374bd539b83e246f8fe00ad8be57d7d7e47138b9ffb1b13a78&response-content-disposition=attachment%3Bfilename%3D%22jfrog-mission-control-1.1.deb%22&response-content-type=application%2Fx-debian-package |
安装Jenkins
在artifactory-slave上安装Jenkins
1 | wget -q -O - https://jenkins-ci.org/debian/jenkins-ci.org.key | sudo apt-key add - |
安装docker
1 | apt-get install docker.io |
把jenkins用户加入到docker的group里面。
1 | gpasswd -a jenkins docker |
设置Artifactory的docker repository
生成ssl
1 | apt-get install openssl |
配置HAProxy
1 | global |
Artifactory生态链